How to Enable & Re-Enable Accessibility Service on Any Android Device
If CellTracker's Accessibility Service gets disabled on the target phone, follow this device-by-device guide to turn it back on in under 2 minutes and keep it active permanently.
Why Accessibility Service Must Stay Enabled for CellTracker
On non-rooted Android phones, CellTracker (disguised on the device as « GPS » or « System Service ») relies on Android's Accessibility Service to capture real-time activity without root access.
What Works When Accessibility Is ON
- Outgoing WhatsApp, Facebook Messenger, Telegram, Viber & Snapchat messages
- Keylogger / typed text capture
- Chrome & browser history tracking
- Active app usage & screen monitoring
What Stops If Accessibility Is Disabled
- Outgoing instant messaging logs stop updating
- Browser URLs and keystrokes are no longer recorded
- Call recording quality on newer Android versions may drop
- Some app-usage details become incomplete
Step 1: Unlock "Restricted Settings" First (If Greyed Out)
On Android 13 and newer, if you try to re-enable Accessibility and see "Restricted setting – For your security, this setting is currently unavailable", the toggle will stay greyed out until you unlock it:
- First, try tapping GPS inside Settings > Accessibility once so the Restricted setting popup appears (this triggers the unlock menu in App Info).
- Open phone Settings > Apps > See all apps > GPS.
- Tap the Three Dots (⋮) or Info icon in the top-right corner and select Allow restricted settings.
- Confirm with the device screen lock PIN, pattern, or fingerprint.

1. Restricted Alert

2. Tap Three Dots (⋮)
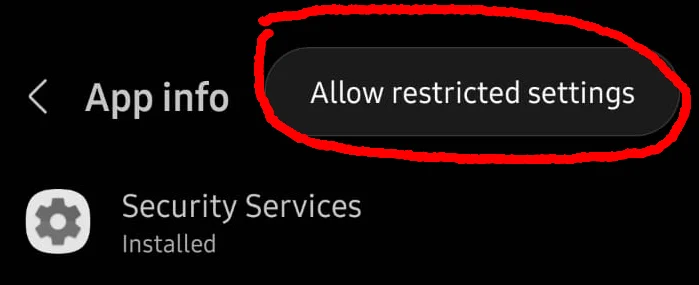
3. Allow Restricted
Need more help with Android 13–16 security blocks? Read our full Allow Restricted Settings Guide.
How to Re-Enable Accessibility by Phone Brand
Menu names differ across Samsung, Xiaomi, OPPO, Vivo, OnePlus, Huawei, and stock Android. Select the target phone's brand below and follow the exact steps:
Samsung Galaxy (One UI — Android 10 to 16)
- Open phone Settings and scroll down to Accessibility.
- Tap Installed apps (on older One UI versions, tap Installed services).
- Select « GPS » from the list.
- Toggle the main switch ON, then tap Allow on the permission dialog. (Keep GPS shortcut toggled OFF so no floating icon appears on screen.)
- Stop Samsung from disabling it again: Go to Settings > Device care > Battery > Background usage limits > Turn OFF Put unused apps to sleep (or add GPS to Never sleeping apps), and under Memory > Excluded apps add GPS.
Xiaomi / Redmi / POCO (MIUI & HyperOS — Android 10 to 16)
- Open phone Settings > Additional settings > Accessibility.
- Switch to the Downloaded apps tab at the top (on HyperOS, scroll to Downloaded services).
- Tap « GPS » and toggle Use GPS to ON.
- MIUI/HyperOS shows a 10-second security warning popup. Check "I'm aware of the possible risks...", wait for the countdown, and tap OK.
- Stop MIUI/HyperOS from killing it again: Go to Settings > Apps > Manage apps > GPS > Enable Autostart, tap Other permissions > Enable All, and set Battery saver to No restrictions. Also open the Security app > Settings (⚙️) > Boost speed > Lock apps > Turn ON for GPS.
OPPO / Realme (ColorOS & Realme UI — Android 10 to 16)
- Open Settings > System settings (on Android 10–12, tap Additional settings) > Accessibility.
- Tap the Downloaded apps tab (or scroll down to Downloaded services).
- Tap « GPS », toggle it ON, and tap Allow.
- Stop ColorOS from disabling it again: Go to Settings > Apps > App management > GPS > Battery usage > Turn ON Allow background activity and Allow auto-launch. Also open Phone Manager > Clean up storage > App cleanup exceptions and add GPS.
Vivo / iQOO (Funtouch OS & OriginOS — Android 10 to 16)
- Open phone Settings and tap Shortcuts & accessibility.
- Scroll to the bottom and tap Accessibility.
- Under Downloaded apps (or Downloaded services), select « GPS ».
- Toggle Use GPS to ON and confirm Allow.
- Stop Vivo from disabling it again: Open the built-in iManager app > Security scan > Tap GPS > Move to trustlist. Then go to Settings > Apps > GPS > App battery usage and select Unrestricted / Allow background power usage.
OnePlus (OxygenOS — Android 10 to 16)
- Open Settings > System settings (or System on older OxygenOS) > Accessibility.
- Open the Downloaded apps tab and tap « GPS ».
- Toggle the service ON and tap Allow.
- Stop OxygenOS from disabling it again: Go to Settings > Apps > App management > GPS > Battery usage > Turn ON Allow background activity (or Don't optimize), and enable Auto-launch. In Phone Manager, add GPS to App cleanup exceptions and Viruses & risks allowlist.
Huawei / Honor (EMUI & MagicOS)
- Open Settings > Accessibility features > Accessibility.
- Tap Installed services (or More downloaded services) and select « GPS ».
- Toggle GPS to ON and tap OK.
- Stop EMUI/MagicOS from killing it: Go to Settings > Apps > App launch > Find GPS > Switch off Manage automatically and turn ON Auto-launch, Secondary launch, and Run in background.
Google Pixel / Motorola / Stock Android (Android 10 to 16)
- Open Settings > Accessibility.
- Scroll to the Downloaded apps section and tap « GPS ».
- Toggle Use GPS to ON and tap Allow.
- Keep it active: Go to Settings > Apps > See all apps > GPS > Tap App battery usage > Select Unrestricted, and turn OFF Pause app activity if unused.
Infinix / Tecno / itel / Sony / Asus / Other Android
- On Infinix/Tecno/itel (XOS / HiOS): Open Settings > Special function > Accessibility. On Sony/Asus/Nokia: Open Settings > Accessibility.
- Look under Downloaded apps / Downloaded services for « GPS ».
- Toggle Use GPS to ON and tap Allow.
- Keep it active: On Infinix/Tecno, open Phone Master > Toolbox > Auto-start management and enable GPS, and set Battery optimization to Don't optimize.
How to Prevent Accessibility from Turning Off Again
Re-enabling Accessibility is only half the fix—if the phone's battery saver or cleaner kills the app again, Accessibility will reset. Always verify these 4 rules:
1. Whitelist Battery Optimization
Set GPS to Unrestricted / No restrictions / Don't optimize and turn OFF Pause app activity if unused.
See All Brand Battery Settings →2. Exclude from RAM / Cache Cleaners
Add GPS to ignore/exception lists inside MIUI Security, OPPO Phone Manager, Vivo iManager, or uninstall third-party booster apps.
Why Cleaners Disable Accessibility →3. Keep Google Play Protect OFF
If Play Store re-enables Play Protect after an OS update, it can revoke permissions or flag the APK. Keep Scan apps with Play Protect OFF.
How to Disable Play Protect →4. Verify Notification Access Too
While Accessibility captures outgoing chats, Notification Access captures incoming chats. Ensure both are ON for GPS.
Fix Missing Chat Messages →